Showing posts with label photography. Show all posts

Thursday, March 12, 2015

Learning photography: exposure time

The exposure time (or also called shutter speed) is probably another very intuitive shooting parameter. It is measured in seconds, and represents the amount of time the sensor will be exposed to the light coming from the scene.

How to read it?

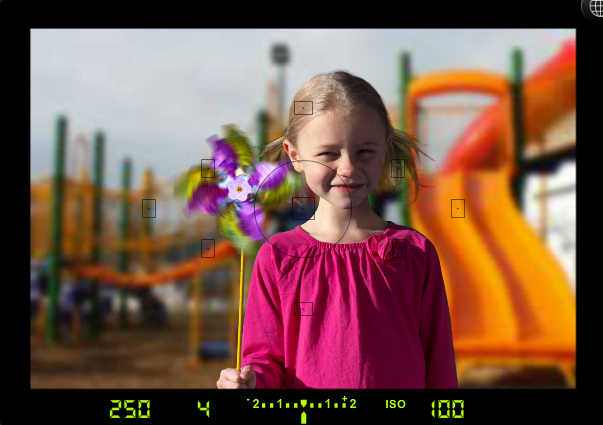
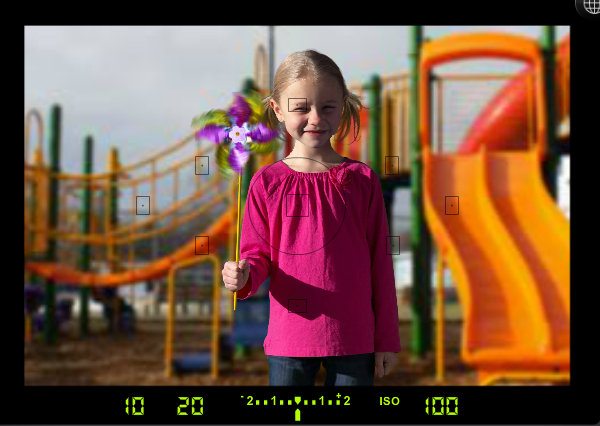
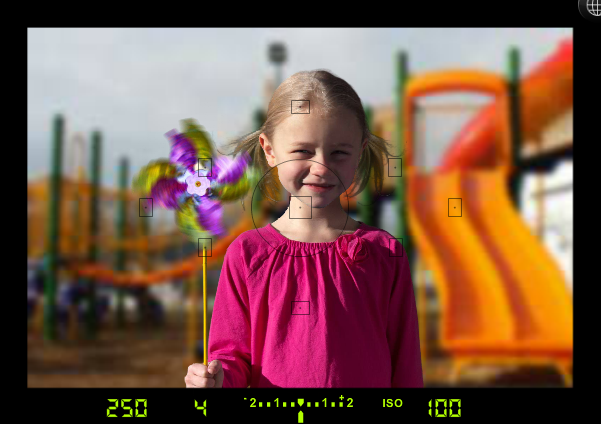
In the example below, there is the exposure time on the bottom left side of the viewfinder. The number 250 represents the exposure time in fractions of seconds (i.e. 1/250 seconds). This is not intuitive at the beginning but you will get familiar with it easily with some practice.   
22798-20857-27127.png
Most of the exposure times you will use as a photographer will be shorter than a second. That’s why the fraction notation is so convenient. Even some bibliography describes this parameter as shutter speed. However there are some cases when exposure time can be as high as many seconds. For those cases a quotation mark (“) will follow the number indicating how it should be read.
Some examples for exposure times shown in the viewfinder:
  • 1” : 1 second
  • 1/10 : 0.1 seconds
  • 1/100 : 0.01 seconds
  • 1/500 : 0.002 seconds

Importance

The exposure time is very important because it allows you to control the exposure value (the longer the exposure time, the higher the exposure value).

To keep in mind

This is a rule that I find very interesting. One stop of light is lost (or gained) as a consequence of halving (or doubling) any of the three main factors that control the amount of light: exposure time, aperture, or ISO. As an example: if you have EV -1, you can either: double the exposure time, double the aperture, or double the ISO. On the other hand, if you have EV +1, you can either: halve the exposure time, halve the aperture, or halve the ISO.

Play with it!

I strongly recommend you to play a bit. Use this fantastic online simulator: CameraSim. Put it in manual mode. Use the following reference settings: ISO 800, f/9 and shutter (exposure time) 1/400 seconds.
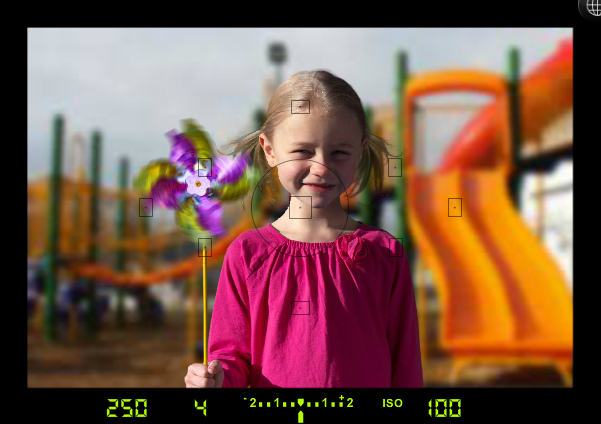
  1. Leave the exposure time at 1/400 seconds. Take a picture. It should look fine as the EV is 0. Try to remember how the pinwheel looks like for exposure time 1/400 seconds.
  2. Keep the manual mode. Increase the exposure time to 1/100 seconds and take a picture. Try to explain why it is so white. Now decrease it to 1/1000 and take a picture. Try to explain why it is so dark. Now repeat the exercise but pay attention to the pinwheel. Is it sharp when taking the picture with 1/100 seconds of exposure time? Why so?
  3. Keep the manual mode. Play a bit with the exposure time to verify that halving it leads to decreasing the EV by one stop of light.

Monday, March 9, 2015

Learning photography: exposure value

The exposure value (EV) is probably the most important concept to understand before trying to get any other insight on photography. The EV indicates the amount of light that will be captured by the sensor during a shot.
The camera estimates the EV using as input the chosen aperture, the exposure time and ISO level, and most importantly, the scene brightness. It all gives as result a simple EV value.

Where is this indicator?

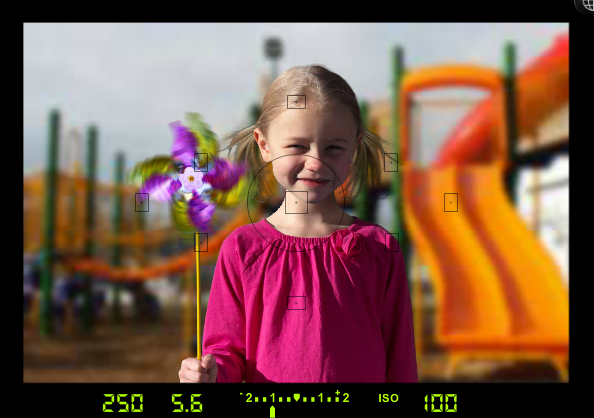
The indicator for the EV is different than the other indicators (which are simply numbers). The EV indicator usually looks like a rake. In the example below, the camera viewfinder shows an EV of 0 (zero).  
22798-20857-27127.png
Do you see it? The little arrow pointing to 0 gives the EV. In this case we have correct exposure.
You must get used to reading this indicator in the viewfinder. It is your only way to know that exposure will be correct.
The EV is measured in [stops of light] (or simply [stops]). There is either correct exposure (EV = 0) or wrong exposure (EV != 0). For wrong exposure cases there will be either overexposure or underexposure.

Overexposure

Cases when there too much light will be captured by the sensor. It corresponds to cases with positive amount of stops of light (+1 or +2), and results of shots in such conditions will be pictures too bright.

31959-4423-29452.png
The resulting shot will be:
20585-9126-3101.png

Correct exposure

Correct exposure is the case when the amount of light captured during the shot allows to reconstruct a good image, similar to what the human eye would perceive. It corresponds to cases with 0 stops of light.
18751-138-29739.png
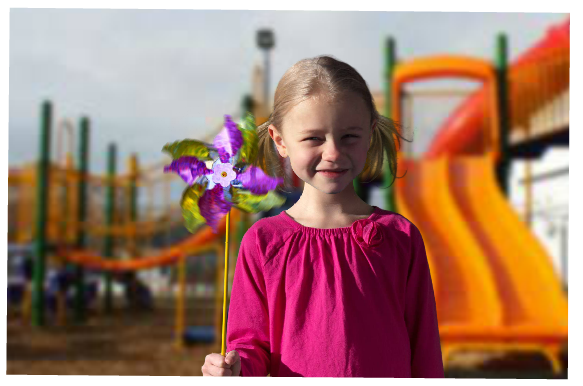
The resulting shot will be:
22047-6591-20943.png

Underexposure

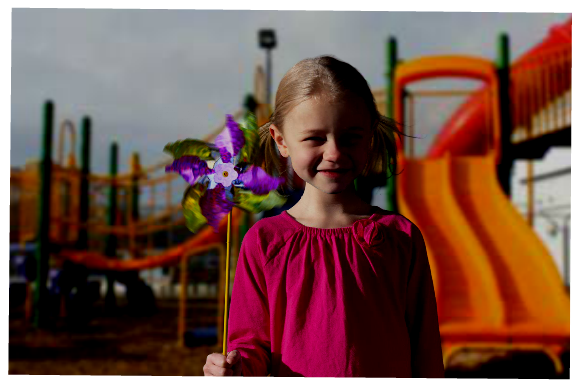
Underexposure occurs when a too low amount of light is captured by the sensor. It corresponds to cases with negative EV (-1 or -2 stops), and shots in such conditions will result in a picture too dark.
32405-1920-8806.png
The resulting shot will be:
23500-28061-682.png

About wrong exposures

DSLR cameras also indicate wrong exposure making other indicators blink in the viewfinder. As a rule of thumb, if there is an indicator blinking, something is going wrong.
In wrong exposure situations, for Shutter priority or Aperture priority modes, the indicator that blinks if there is wrong exposure depends on the mode chosen. For instance, if mode is Shutter priority, then on wrong exposure situations Shutter speed (Exposure time) will blink. On the other hand, if mode is Aperture priority, the aperture indicator will blink. This will be addressed in a different post, about Priority modes.

To keep in mind

This is a rule that I find very interesting. One stop of light is lost (or gained) as a consequence of halving (or doubling) any of the three main factors that control the amount of light: exposure time, aperture, or ISO. As an example: if you have EV -1, you can either: double the exposure time, double the aperture, or double the ISO. On the other hand, if you have EV +1, you can either: halve the exposure time, halve the aperture, or halve the ISO.

Play with it!

I strongly recommend you to play a bit. Use this fantastic online simulator: CameraSim.
Put it in manual mode. Use the following reference settings: ISO 800, f/9 and shutter (exposure time) 1/400 seconds.
  1. Check what is the EV for such case. Take a picture and see what correct exposure looks like.
  2. Keep the manual mode. Play a bit with each shooting parameter to verify that doubling any of ISO, aperture or shutter leads to increasing the EV by one stop of light. For instance, taking ISO from 800 to 1600 results in EV +1. The same way, increasing the shutter (exposure time) from 1/400 to 1/200 increases EV by +1 stop of light.
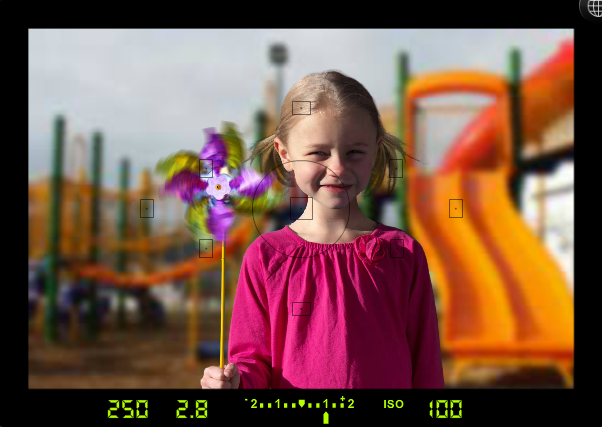
  3. Keep the manual mode. Play a bit with each shooting parameter to verify that halving any of ISO, aperture or shutter leads to decreasing the EV by one stop of light.

What now?

I strongly recommend you to get use to the numbers of this shooting parameter. You should be able to answer questions like “what does EV=+1 mean?” and “how many ways of correcting such EV do we have?”.
After that you can go to the next step: ISO level

Saturday, March 7, 2015

Learning photography: ISO level

The ISO level indicates how sensitive is the camera sensor to light. I consider the ISO level a rescue shooting parameter, as it allows to get impossible pictures (exposure-wise) by sacrificing some quality.
My rule of thumb: ISO level should be always as low as possible.  
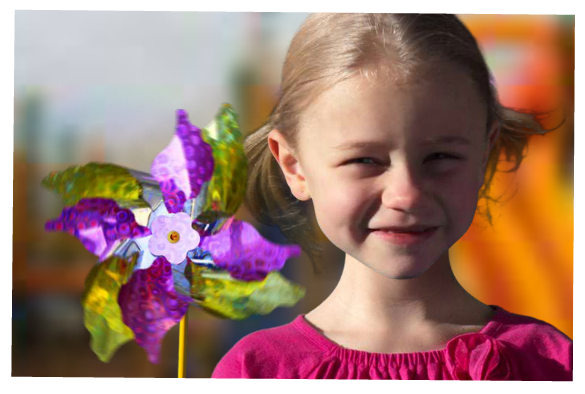
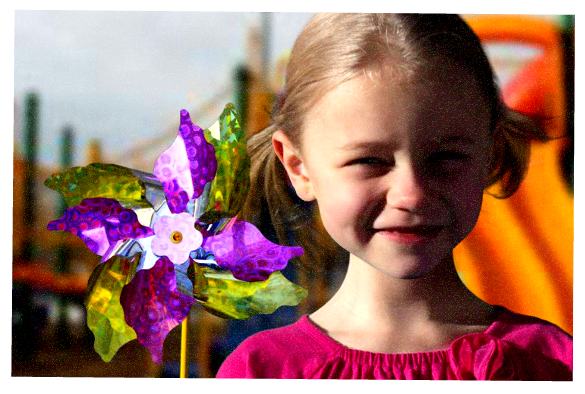
Why so? High ISO levels (higher than 1600) add a lot of noise to the pictures, which makes it look dirty. Consider the two examples below.  
The following picture was taken using ISO level 100.
iso100.png
However, the following picture was taken using ISO level 6400.
iso6400.png
Can you see the difference? Focus on the girl’s forehead. Do you see how in the first picture (ISO 100) the image seems smooth, while in the second one (ISO 6400) there seems to be some abnormal pixels? That’s noise, consequence of high ISO levels.  

When to use high ISO levels then?

High ISO levels can be used when neither increasing the aperture nor increasing the exposure time are enough to get correct exposure.

Play with it!

I strongly recommend you to play a bit. Put your camera in any mode and experiment with this setting, find differences when using ISO 100 and ISO 6400. Get familiar with the numbers and their consequences.
If you don't have your camera with you, you can use some fantastic online simulators. The one I recommend is CameraSim.

Learning photography: focal length

The focal length is probably the most intuitive photography parameter to explain. It is simply what is known as zoom. Although not intuitive, this parameter is measured in millimeters (mm).

Where do I find it in my viewfinder?

DSLR cameras have a viewfinder through which you can set up your shoot, and view the scene at the same time. It should look something as the image below.
18mm.png
The viewfinder shows many parameters of shooting: exposure time, F number, exposure, ISO level, focus point.  These are explained in my other posts. However, in most of the DSLR cameras the focal length is not shown numerically: you can just observe the obvious effects of it on the scene you capture.

Reference values

  • A 18mm focal length setting provides a field of view which is wide. It allows to capture a larger part of the scene without stepping back, as if you had zoomed out. See the image below as an example.
18mm.png
  • In the other hand, a 55mm focal length setting allows you capture a narrower part of the scene, as if you had zoomed in. This focal length setting is similar to the human perception. See the image below as an example.
55mm.png
  • A 200mm focal length setting would provide an even narrower field of view, capturing a very limited part of the scene. To have an idea, 200mm is equivalent to a 4x zoom (zoom in).

Focal length range

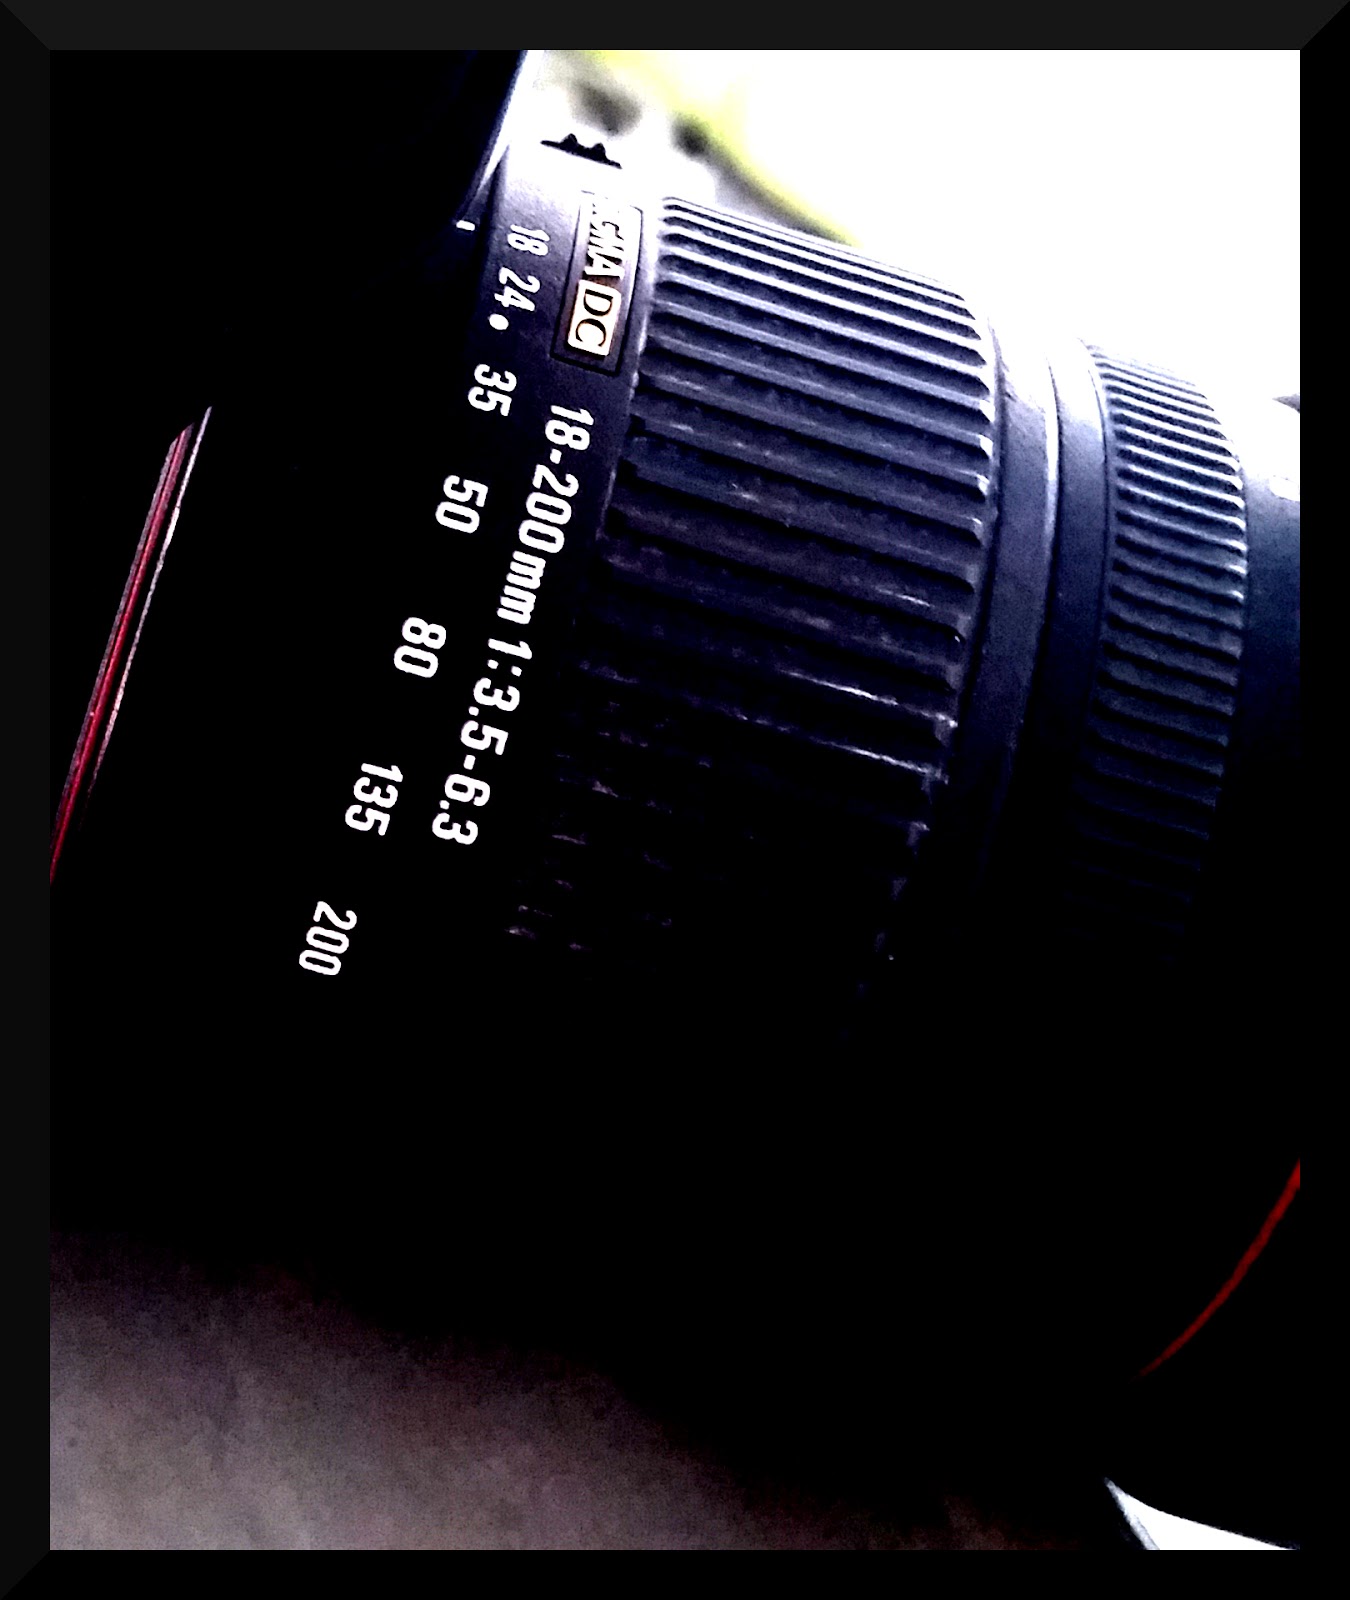
One of the properties of lenses is their focal length range. Lenses sold with the body of the camera usually have the focal length range that goes from 18mm to 55mm. This means you can zoom in/out on the fly by just turning a lens ring. Compact cameras also have a wide focal length range too.
The image below shows a lens with a 18-200mm focal length range.
delete.jpg

Fixed focal length lenses

There are some lenses with fixed focal length. Why would someone buy such lenses? Well, there are many reasons. First of all, lenses' prices are very related to the amount of glass they contain. Prime lenses, i.e. the ones with fixed focal length, have less glass elements, so are usually cheaper. Also they are lighter, and smaller, so more convenient to travel. As they have less glass elements, they keep better the properties of the image too, so pictures have better quality. Also, prime lenses allow bigger apertures, which allows to take pictures in low light conditions, and movement conditions (like car racing shots, for instance). On the other hand, this kind of lenses lack of zoom, which makes you move your legs to get a nice perspective (I consider this also a good point though).

Play with it!

I strongly recommend you to play a bit. Put your camera in automatic mode an experiment with this setting, find differences when using 18mm, 30mm, and 55mm. Get familiar with the numbers, they will become very handy when discussing with other people.
If you don't have your camera with you, you can use some fantastic online simulators. The one I recommend is CameraSim. Play with the different focal lengths and get familiar with their effects on the scene captured.

What is next?


You should learn now about: Exposure value

Learning photography

Just bought your new DSLR camera and felt limited by its automatic mode? Just noticed portrait pictures taken by a friend of yours look way better than yours, even with the same camera and lenses? What's going on???
Good news!!! Your camera is probably not broken, you just need to read... THIS POST!

Inspiration

Some pictures help me get inspired. I usually use them as reference from the technical point of view too. Find below some of my favorite shots (thanks Emma Iarussi!!!).
If you feel like having some more, visit Emmanuel’s album here. There is this other album that also admire, in case you need more!

Shooting parameters

Here you have the most essential shooting parameters, and a post to learn about each of them.
I strongly recommend you to start with the Focal length post. 

Enjoy!